
Hello there,
I am looking for software that subdivides a giant texture (in my case, textures up to 64K) into smaller tiles for each level for a VT.
Does anyone have any idea where I can find such a software?
(EDIT: I have tried Ftex tools and I either cannot figure out how to use it or it does not work on my computer)
Looking for VT tile making software
Forum rules
Please help to make this forum more useful by checking the FAQs before posting! Keep it clean, keep it civil, keep it truthful, stay on topic, be responsible, share your knowledge.
Please help to make this forum more useful by checking the FAQs before posting! Keep it clean, keep it civil, keep it truthful, stay on topic, be responsible, share your knowledge.
-
 Topic authorShadow-Dragon-777
 - Posts: 71
- Joined: 03.11.2021
- Age: 30
- With us: 2 years 6 months
- Location: A Galaxy Far Far Away....
Looking for VT tile making software
Last edited by Shadow-Dragon-777 on 29.11.2021, 14:33, edited 1 time in total.
-
Topic authorShadow-Dragon-777
- Posts: 71
- Joined: 03.11.2021
- Age: 30
- With us: 2 years 6 months
- Location: A Galaxy Far Far Away....
-
John Van Vliet

- Posts: 2940
- Joined: 28.08.2002
- With us: 21 years 8 months
-
trappistplanets
- Posts: 641
- Joined: 11.06.2020
- Age: 17
- With us: 3 years 11 months
possible for anyone to show him how to use the Ftex's tools (witch shadow said needs CMD, witch is confusing the living heck out of him)
or help him with troubleshooting the program and see why its not working (if this is the case) and get it fixed
or help him with troubleshooting the program and see why its not working (if this is the case) and get it fixed
There is a limit to how far we can travel into the stars.
Owner of "The Grand Voyage" addon series
Collaborating with Dangerous_safety for the still developing Cer system
Owner of "The Grand Voyage" addon series
Collaborating with Dangerous_safety for the still developing Cer system
-
SevenSpheres

- Moderator
- Posts: 822
- Joined: 08.10.2019
- With us: 4 years 7 months
Some members on the Discord server have been helping him with it, but it hasn't been working. According to John Van Vliet's post above, it's because the input images need to be in a raw format, like with NmTools. I've tried converting png images to raw images using both GIMP and (today) G'MIC for use with NmTools, but the results weren't much better.
Just recently on Discord, ajtribick suggested that F-TexTools and NmTools may not work on Windows. If that's the case, then probably the only way to create VTs on Windows is what john71 said.
Just recently on Discord, ajtribick suggested that F-TexTools and NmTools may not work on Windows. If that's the case, then probably the only way to create VTs on Windows is what john71 said.
My Addons: viewtopic.php?f=23&t=19978 • Discord server admin
Celestia versions: 1.5.1, 1.6.1, 1.6.2, 1.7.0, and some unofficial versions like Celestia-ED
Celestia versions: 1.5.1, 1.6.1, 1.6.2, 1.7.0, and some unofficial versions like Celestia-ED
SevenSpheres wrote:probably the only way to create VTs on Windows is what john71 said.
Gimp allocates the tx_ x_y tile designations perfectly, after that you can use a batch renaming utility to change the name of the Gimp exported tiles in one step.
You only have to export manually the tiles, which are 2, 8, 32 etc. manual exports.
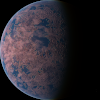
I was able to create a 256k Mars VT manually, in a few days.
-
John Van Vliet
- Posts: 2940
- Joined: 28.08.2002
- With us: 21 years 8 months
for the getting ancient fxtools libpng 12 MUST be installed
this is the std output of just running "txtiles" without any arguments
the input image MUST!!! be a raw image
use " png2bin" -- part of the texture tools package
that gives you a 8 bit raw image
then as per the std output above that tells you how to use it
you run ( for an 8 k image level3 vt with level 3 png compression)
Code: Select all
(isis) john@localhost:/DATA/SUSE/bin> txtiles

Usage: txtiles <channels> <width> <level> [<PNG_compression>]

Version 1.0, August 2007, author: F. Schrempp

--------------------------------------------------------------------
The program reads textures in unsigned bpp x 8 bit integer raw format
from STDIN. It outputs VT tiles with many optimizations in PNG format.
--------------------------------------------------------------------

Units    : tilesize[pixel] = width/2^(level+1).

Input    : Interleaved RGB(A) storage mode ie. RGB(A)RGB(A)RGB(A)...
           for RGB (+ alpha) textures
           Inputwidth : inputheight = 2 : 1, power-of-two size.
           No header.
Default  : PNG_compression = Z_BEST_SPEED = 1
         : best choice for subsequent DXT compression!

For VT tiles in PNG format, enter PNG_compression = 6..9 (slow!)

For 4 x 8 bit RGB + alpha textures enter channels = 4.
For 3 x 8 bit  colored    textures enter channels = 3.
For 1 x 8 bit grayscale   textures enter channels = 1.

(isis) john@localhost:/DATA/SUSE/bin>
this is the std output of just running "txtiles" without any arguments
the input image MUST!!! be a raw image
use " png2bin" -- part of the texture tools package
Code: Select all
png2bin < InputImage.png > OutPutImage.raw
that gives you a 8 bit raw image
then as per the std output above that tells you how to use it
Code: Select all
txtiles <channels> <width> <level> [<PNG_compression>]
you run ( for an 8 k image level3 vt with level 3 png compression)
Code: Select all
txtiles 3 8192 3 3 < InputImage.raw
FWIW, I use a bash script based on Fridger's original zsh script which uses ImageMagick's convert utility. It isn't particularly fast, but is understandable (to me, anyhow). I use Cygwin under Windows to provide a linux-like environment with bash and ImageMagick, although Miicrosoft's "Windows Subsystem for Linux" (available for free through the Microsoft Store) probably would work, too.
Performance greatly depends on the amount of RAM, too. When using this virtualtex script, if three copies of the original full-resolution surface texture image don't fit into RAM, the computer will "page itself to death" (i.e. run absurdly slowly) because it has to use on-disk virtual memory.
Performance greatly depends on the amount of RAM, too. When using this virtualtex script, if three copies of the original full-resolution surface texture image don't fit into RAM, the computer will "page itself to death" (i.e. run absurdly slowly) because it has to use on-disk virtual memory.
- Attachments
-
 virtualtex.zip
- script to split large image into smaller tiles
- (2.55 KiB) Downloaded 218 times
Selden
selden wrote:FWIW, I use a bash script based on Fridger's original zsh script which uses ImageMagick's convert utility.
I think this problem should be handled by the developers (?). Or maybe a Gimp plugin would be practical, because Gimp has excellent memory handling capabilities and can slice and convert any image file. Using RAW files is not a great solution in 2021. Using Gimp manual slicing also sucks in my opinion, compared to an automated solution.
Without future VTs Celestia is dead.
-
John Van Vliet
- Posts: 2940
- Joined: 28.08.2002
- With us: 21 years 8 months
i use Vips image library and the Nip2 GUI quite a lot
here is my bash script
it takes as input a Vips ( *.v ) image and exports png tiles
a 64 k map takes about 4 min. to run
the script can also be edited to except any supported image format by un commenting out a few lines
here is my bash script
it takes as input a Vips ( *.v ) image and exports png tiles
a 64 k map takes about 4 min. to run
the script can also be edited to except any supported image format by un commenting out a few lines
Code: Select all
#! /bin/bash
function min () {
         if(( $1 < $2 )); then
                  echo $1
         else
                  echo $2
         fi
}

if [ $# -lt 3 -o "$1" = " --help" ] ; then
 echo
 echo ' Usage: vipsvt [--help | <texture name><tile size><tile format>] [e|E|w|W]'
 echo
else
block_width=$2;
block_height=$2;

dir=`dirname $1`
file=`basename $1`
fileformat=$3
#copy=$$_$file.v
 #echo making local copy of image as $copy ...

#vips im_copy $1 $copy

width=`vips im_header_int Xsize $file`
height=`vips im_header_int Ysize $file`

j=0

while (( j * block_width + block_width <= height ));do
      ((top = j * block_width ))
  if [ $# -eq 4 ]; then
     if [ "$4" = "e" -o "$4" = "E" ]; then
          ioff=$(( width/block_width ))
     elif ["$4" = "w" -o "$4" = "W" ]; then
          ioff=0
      else
       echo
       echo "*** Incorrect 4th paramenter! **"
       echo
      return
    fi
 fi

i=0

    while (( i * block_width + block_width <= width )); do
          ((left = i * block_width))
          toname=$dir/tx_$((i + ioff))_${j}.$fileformat

          ((right = $width - $left))
          ((bottom = $height - $top))

          tile_width=`min $block_width $right`
          tile_height=`min $block_height $bottom`

     echo extracting tile $left $top as $toname
          vips im_extract_area $file $toname \
              $left $top $tile_width $tile_height


   ((i++))
   done
   ((j++))
  done

  # rm $$_$file.v
  # rm $copy
   #rm $$_$file.desc
fi
-
Topic authorShadow-Dragon-777
- Posts: 71
- Joined: 03.11.2021
- Age: 30
- With us: 2 years 6 months
- Location: A Galaxy Far Far Away....
You should use 8192x8192 pixels tiles, so you have to slice only 2, 8 or 32 parts.
Use Image/Guides/New Guide by percent.
You need 1 vertical line in 16k (50%), 3 vertical and 1 horizontal lines in 32k (25%, 50%, 75% and 50% again).
At 64k you have to add 12,5%, 37,5% and so on.
After adding the guides, you slice in one step, but you have to export each new image manually.
You should also change the names: when there is ......0-0, the name should be tx_0_0.
-
Topic authorShadow-Dragon-777
- Posts: 71
- Joined: 03.11.2021
- Age: 30
- With us: 2 years 6 months
- Location: A Galaxy Far Far Away....
I believe I may have found a shortcut that shortens this process greatly in Gimp. The filter section has a web slice function that I tested on a 16K Charon LOK texture I made and it seems to be able to do the job rather well, mass exporting the sliced images to PNG and adding a prefix to the tiles. though the guides still have to be placed manually before doing this, Gimp still to this day doesn't have a grid to guide transformation function. This tool shortens the process from taking a few days to taking just a couple hours. All I have to do is add the hundred something guides, put "tx" in image name prefix, and put it in the appropriately named level folder. Now to find a day where I have a few hours to do this.
Few questions:
Is 65536 pixel appropriate for level6 textures?
Are 1024 x 512 textures an appropriate size to use for tiles?
Few questions:
Is 65536 pixel appropriate for level6 textures?
Are 1024 x 512 textures an appropriate size to use for tiles?
Shadow-Dragon-777 wrote:Is 65536 pixel appropriate for level6 textures?
Are 1024 x 512 textures an appropriate size to use for tiles?
Levels are like this:
level0 2 tiles
level1 8 tiles
level2 32 tiles
level3 128 tiles
level4 512 tiles.
If you use small tiles (like 512x512 or 1024x1024), it means you need a LOT of levels.
On the other hand if you use 8192x8192 pixels tiles you will reach 64k at level2, 128k at level3 and 256k at level 4.
-
Topic authorShadow-Dragon-777
- Posts: 71
- Joined: 03.11.2021
- Age: 30
- With us: 2 years 6 months
- Location: A Galaxy Far Far Away....
Well, update: I was able to get the images made but... Gimp names the tiles backwards IE the x coordinates are the y coordinates. I had to manually rename each one to its correct coordinate which took a few hours. After this the Titan texture worked perfectly. I plan to eventually release it here once I get a VT closeup of the Huygens landing site.