Simple Blender Cloud Texture Maker

Tips for creating and manipulating planet textures for Celestia.
Avatar
Topic author
MrSpace43
Posts: 271
Joined: 10.12.2017
Age: 19
With us: 6 years 5 months
Location: California, USA
Contact:

Simple Blender Cloud Texture Maker

Post #1by MrSpace43 » 30.05.2021, 21:43

So earlier today, I made a cloud texture map generator in Blender, and I am releasing it to the public for anyone to use:
https://www.mediafire.com/file/xmzo96pxoe492ri/Cloud_Texture_Maker.blend/file
(This only works in v2.83.3 or higher)

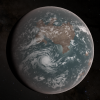
So when you open the file, you should get something that looks like this:
Pic1.png

What we have to do now is change the render setting to "Viewport Shading" by clicking this icon at the top-right of the window with the sphere:
Pic2.png
Pic2.png (5.96 KiB) Viewed 6558 times

You should now see this:
Pic3.png

If we go down to the node tab and move over, we see this noise setting which will determine the look of the clouds:
Pic4.png
Pic4.png (14.07 KiB) Viewed 6558 times

-W: This is just the seed for the texture
-Distortion: I recommend setting it between 0.3 and 0.85
-Scale: Set this between 4.5 and 10 for something that looks Earth-like
LEAVE EVERYTHING ELSE UNTOUCHED

When you get something you are satisfied with, select this node and click on the "New Image" icon circled in red:
Pic5.png
Pic5.png (20.76 KiB) Viewed 6558 times

You should get this menu. Make sure you have the width and height in a 2:1 ratio (example: 4096x2048). You can name the image anything you like. Once done, click "OK":
Pic6.png
Pic6.png (25.96 KiB) Viewed 6558 times

Make sure that you have the sphere and the image node selected, and then click on "Bake":
Pic7.png

This will take some time depending on your PC or the size of the image texture that you set.

Once the texture is finished being baked, you should see the output on the bottom-left, but we aren't actually gonna touch this here:
Pic8.png

We are instead going to click the "Texture Paint" tab:
Pic9.png
Pic9.png (4.58 KiB) Viewed 6558 times

You should see this menu:
Pic10.png

You will then click on "Image," and then "Save As...":
Pic11.png

Find a good place to save the file, and voilà! an alpha cloud map texture ready for any use:
Tutorial Cloud Map Forums.png
Last edited by MrSpace43 on 02.03.2022, 18:05, edited 1 time in total.
Been into Astronomy since the age of 3 or 4. Started making planetary textures back in late 2016. 3D animator who makes high quality animations in Cinema 4D. Likes to sometimes, deliberately torment myself with the stupid green screaming apatosaurus that is Arlo.

My addons page: https://celestiaproject.space/forum/viewtopic.php?f=23&t=22167

Avatar
trappistplanets
Posts: 641
Joined: 11.06.2020
Age: 17
With us: 3 years 11 months

Post #2by trappistplanets » 30.05.2021, 23:39

MrSpace43 wrote:(This only works in v2.83.3 or higher)
possible to make a verson that works in 2.70 (or other versons below 2.83.3)?
i am asking because not everyone can use the compatible versions with this verson of the cloud gen bc of computer limitations
There is a limit to how far we can travel into the stars.
Owner of "The Grand Voyage" addon series
Collaborating with Dangerous_safety for the still developing Cer system

Avatar
Topic author
MrSpace43
Posts: 271
Joined: 10.12.2017
Age: 19
With us: 6 years 5 months
Location: California, USA
Contact:

Post #3by MrSpace43 » 30.05.2021, 23:43

trappistplanets wrote:possible to make a verson that works in 2.70 (or other versons below 2.83.3)?
Yeah sorry but I can't help on that, as I don't want to waste another hour or 2 to make a new preset (not all versions of blender are equal, and I don't use blender much).
Been into Astronomy since the age of 3 or 4. Started making planetary textures back in late 2016. 3D animator who makes high quality animations in Cinema 4D. Likes to sometimes, deliberately torment myself with the stupid green screaming apatosaurus that is Arlo.

My addons page: https://celestiaproject.space/forum/viewtopic.php?f=23&t=22167

Avatar
trappistplanets
Posts: 641
Joined: 11.06.2020
Age: 17
With us: 3 years 11 months

Post #4by trappistplanets » 30.05.2021, 23:46

MrSpace43 wrote:Yeah sorry but I can't help on that, as I don't want to waste another hour or 2 to make a new preset (not all versions of blender are equal, and I don't use blender much).
what will happen if i try to open this current gen in my 2.70?

Added after 34 seconds:
what is your node set up?
i want to see if i can recreate it the best i can
There is a limit to how far we can travel into the stars.
Owner of "The Grand Voyage" addon series
Collaborating with Dangerous_safety for the still developing Cer system

Avatar
John Van Vliet
Posts: 2940
Joined: 28.08.2002
With us: 21 years 8 months

Post #5by John Van Vliet » 01.06.2021, 15:25

not sure about MrSpace43's node set up trappistplanets , but this is mine

Screenshot_20210601_112125.png


it might work on 2.7

Avatar
Topic author
MrSpace43
Posts: 271
Joined: 10.12.2017
Age: 19
With us: 6 years 5 months
Location: California, USA
Contact:

Post #6by MrSpace43 » 01.06.2021, 15:56

Funny though, my setup is actually a lot simpler, as it uses a total of only 6 nodes.
Been into Astronomy since the age of 3 or 4. Started making planetary textures back in late 2016. 3D animator who makes high quality animations in Cinema 4D. Likes to sometimes, deliberately torment myself with the stupid green screaming apatosaurus that is Arlo.

My addons page: https://celestiaproject.space/forum/viewtopic.php?f=23&t=22167

Avatar
trappistplanets
Posts: 641
Joined: 11.06.2020
Age: 17
With us: 3 years 11 months

Post #7by trappistplanets » 01.06.2021, 18:49

MrSpace43 wrote:Funny though, my setup is actually a lot simpler, as it uses a total of only 6 nodes.
6 nodes!?
There is a limit to how far we can travel into the stars.
Owner of "The Grand Voyage" addon series
Collaborating with Dangerous_safety for the still developing Cer system

Avatar
John Van Vliet
Posts: 2940
Joined: 28.08.2002
With us: 21 years 8 months

Post #8by John Van Vliet » 01.06.2021, 21:53

well i stuck in a "maprange" node before the "color ramp" node to keep all the values in the positive

basically i am subtracting two noise sources from each other


Return to “Textures”